


If you can bake bread, then you can braid bread. It's that easy, and we'll show you how.
There are few foods more beautiful than a braided loaf of bread. The technique looks intimidating, but braiding bread is almost as easy as baking bread. Once you understand the basics, you may never bake bread any other way!
Braided breads can be assembled with two to eight ropes of dough, but the gist is the same: Divide the dough into balls, roll them into ropes, and twist and braid them until the loaf is ready to go in the oven. As you get more familiar with the technique, you can experiment with more complex designs—from a basic three-strand braid to an ornately woven eight-strand plait.
Braided breads often are made from dough enriched with eggs and milk. These doughs turn into egg bread, challah and brioche, a sweetened variety of braided egg bread made with a high ratio of butter for extra richness (it makes delicious French toast). No matter the recipe, you can make stunning braided bread that will be a show-stopping addition to any meal.
Why braid bread?
Beyond aesthetics, there are a few notable reasons to braid bread. First, braiding bread offers essential structural support to the loaves. Enriched dough is soft and tender due to its high fat content, which means that the loaves lack the structural integrity of large, traditional crusty loaves. Braiding the dough is an insurance policy against collapse, ensuring the loaves rise high and bake with the proper texture.
Additionally, braiding bread promotes even baking by offering a more even surface for heat distribution. It also helps with moisture retention to make softer, more tender loaves.
Finally, braided bread is steeped in tradition and symbolism. Challah, for example, has long been symbolic of unity, interconnectedness, love and family. It also has religious connotations, with a 12-strand challah loaf representing the twelve tribes of Israel. Italian Easter bread is also rooted in religious symbolism.
The Best Dough for Braided Bread
The best part about braided bread is that you can make it with almost any type of bread dough. This simple celebration braid is a great place to start, but you can use your favorite plain white bread or yeasted roll recipe. You can even buy premade bread dough from the store. But enriched dough made with eggs, milk, butter or oil is most popular for braided loaves.
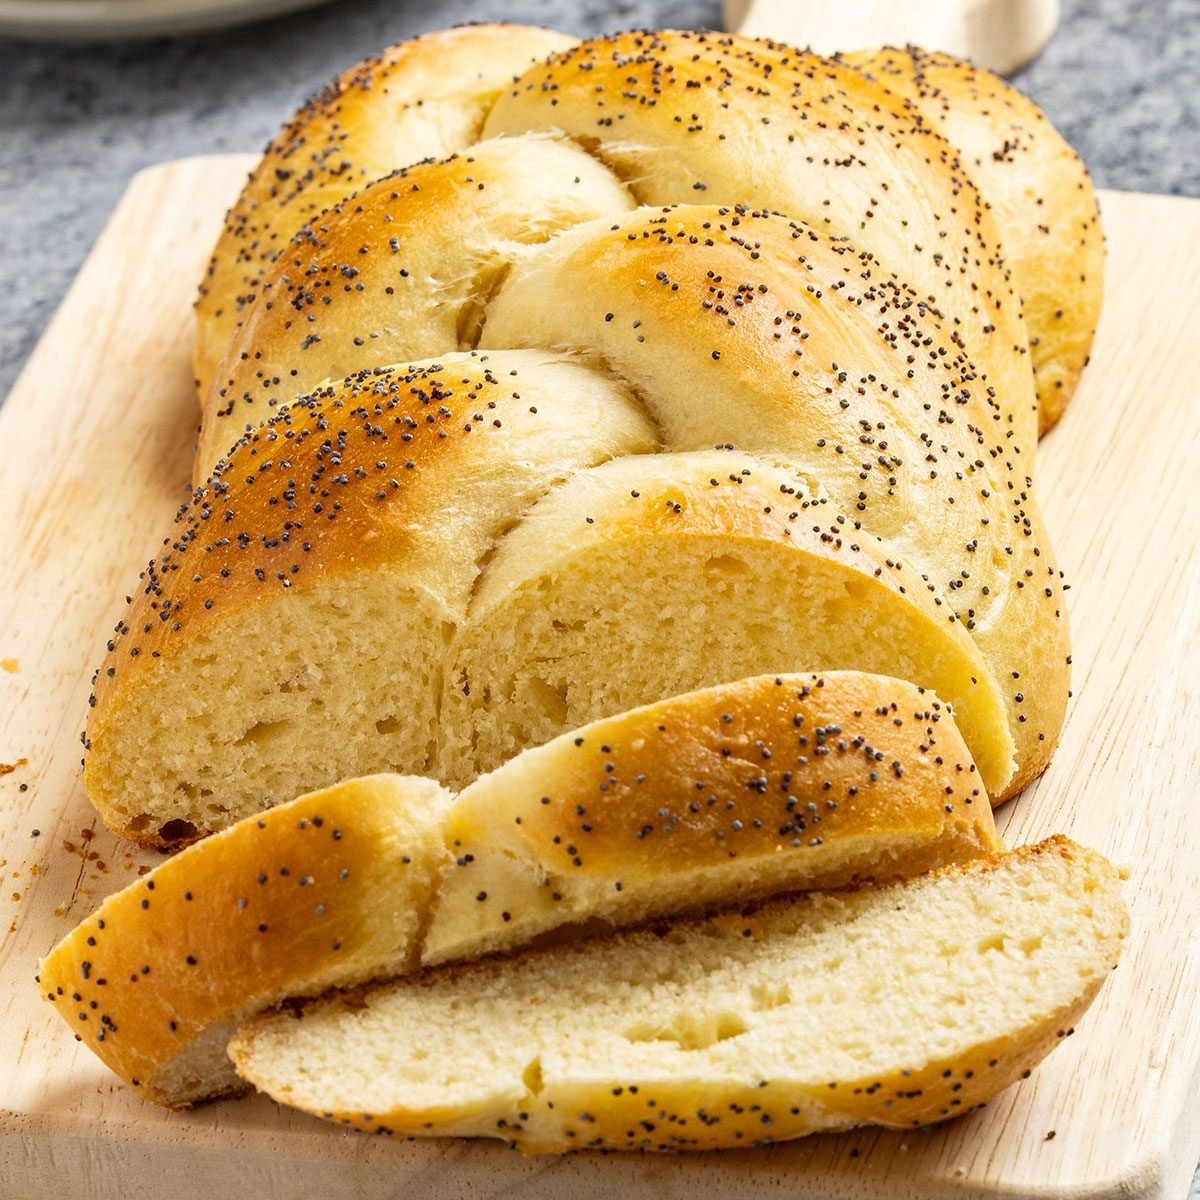
While many braided breads are left plain, you can flavor the dough with sweet or savory mix-ins. We love the sweet additions in this cardamom braid bread with honey, but you can also add savory ingredients like garlic, herbs, cheddar cheese, peppers or corn. A garlic-herb braid is always a crowd-pleaser. You can also keep things simple by adding some texture to the top. Sprinkle sesame seeds, poppy seeds, sunflower kernels and more over the egg wash to turn your braid into a multigrain loaf.
How to Braid Bread: Step by Step
Let’s get braiding. Before you begin, you’ll want to select a recipe for braided bread, prepare the dough and gather a few essential supplies. These instructions are for a three-strand braided loaf, but the basics are the same for any plait.
What you’ll need
- Your favorite bread dough recipe (such as challah, brioche or egg bread)
- Flour (to keep the dough from sticking)
- Nonstick cooking spray
- An unrimmed baking sheet
Directions
Step 1: Divide the dough into ropes
Place the dough on a lightly floured work surface and divide it into three equal pieces. Roll each piece into a rope, using even pressure, so the ropes are the same width from end to end. When finished, all three ropes should be the same length.
Editor’s Tip: You may need to lightly flour your hands, especially if your dough is soft. Don’t add too much, otherwise the dough will slide back and forth on the counter. Add just enough flour to your hands or the work surface so the dough doesn’t stick.
Step 2: Braid the ropes
Arrange the ropes on a greased, unrimmed baking sheet. Make sure each rope is equal in length and none is longer than the baking sheet. Pinch the ropes together at one end and tuck the ends under so they look nice and neat. Then, begin braiding by crossing the right rope over the center rope. Then, cross the left rope over the center. Continue alternating right and left over the center until the braid is done.
Editor’s Tip: Braiding the bread directly on the sheet pan means you won’t have to move the braid. That decreases the risk of stretching the dough once it’s finished.
Step 3: Pinch and tuck the end
Once you’ve reached the end of the dough, pinch the ropes together and gently tuck the ends underneath the braid to give the bread a clean, finished look.
Step 4: Proof the loaf

Next, proof the bread in a warm place until it has doubled in size. The total time will vary depending on your dough recipe, but it will typically be between one and two hours. To prevent drying, cover the dough with a clean tea towel or storage wrap sprayed with cooking spray.
Editor’s Tip: Proper bread dough proofing is an art and a science. The poke test is one trick to help you gauge whether your beautifully braided loaf is ready for the oven. Gently poke a finger into the dough. If the depression remains, then your loaf is ready to bake.
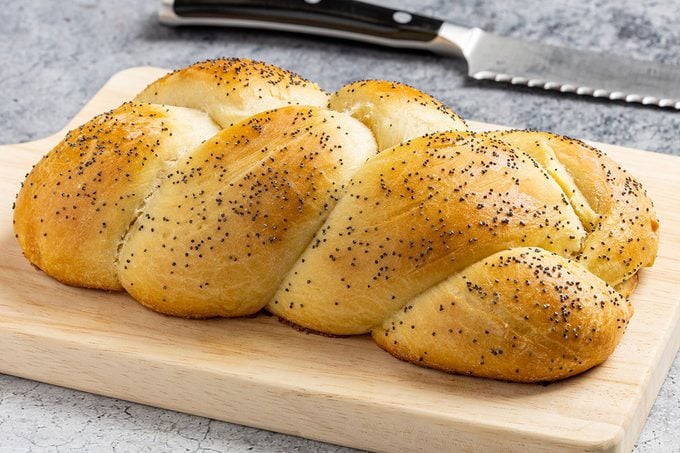
Step 5: Bake the bread
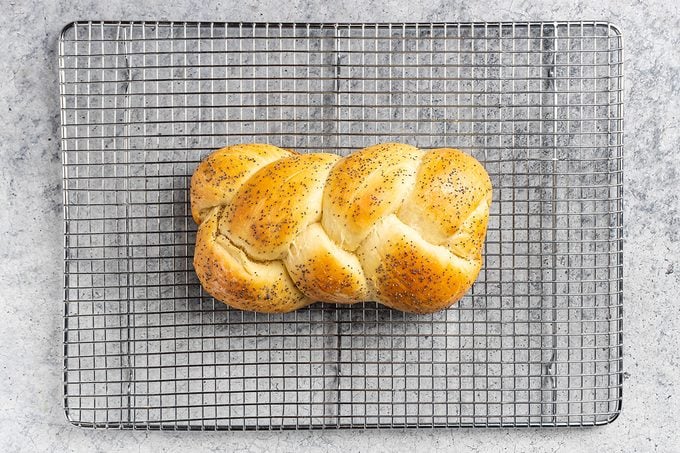
Brush the top with an egg wash—1 egg whisked with 1 tablespoon of water—to give it a glossy look. Sprinkle the top with any textured toppings (like sesame or poppy seeds) and pop the loaf into a preheated oven. Follow the recipe’s baking instructions for time and temperature (or the package instructions if you’re using store-bought dough).
Allow the bread to cool completely before slicing it. Braided bread makes an excellent addition to the dinner table with flavored butter, but it also makes great sandwiches and is excellent for French toast recipes.
Other Braided Breads
For a four-strand braid
To make a four-strand braid, divide your dough into four equal pieces. Roll each piece into a rope of equal length and thickness and lay them on the counter vertically so one end of each point is facing you. Join the strands at the top and pinch them together. To start, lift the rightmost strand and cross it all the way over the strands to the left, placing it almost horizontally across the top.
Do the same with the leftmost strand (which is now technically second from the left), crossing it over the strands to the right, placing it horizontally across the top (so your strands are almost in a T shape). Now move that top left strand across and down the center of the two middle strands. Then, lift the strand second from the right and cross it over to the left; now the rightmost strand goes down the middle. Repeat this process, starting the technique at the beginning of this paragraph and onwards, until you reach the end of the strands. Pinch and tuck the ends of the plait for a neat appearance.
For a six-strand braid
For a six-strand braid, begin with six ropes of dough of equal length and thickness. Join the strands at the top and pinch them together. Take the far left strand and cross it all the way to the right, so it sticks straight out to the right side. Next, take what had been the far right strand and cross it to the left over the remaining four strands, so it is sticking straight out. There should now be four strands remaining in the middle. Taking the strand you started with (now on the far right), fold it so it is directly in the middle (with two strands on either side of it, with one strand still on the far left sticking straight out). Next, grab the second-most-left strand and pull it all the way to the right, so it sticks straight out. Return to the strand sticking out on the far left and bring it back to the middle between the four strands. Repeat this process, working back and forth from the right and left until you reach the end of the strands. Pinch and tuck the ends together.
For an eight-strand braid
To make an intricate eight-strand braid, shape and divide your dough into eight ropes of equal length and thickness. Then, mentally number the strands 1 through 8, starting on the left. No need to label or memorize the strands; each time you move a rope, its number will update to its current position. Begin by placing strand 8 under strand 7 and over strand 1. This is the only time you will perform this movement. Next, begin the steps that will repeat by placing strand 8 over strand 5. Then place strand 2 under strand 3 and over strand 8. Continue by placing strand 1 on the far left over strand 4. Lift strand 7 and thread it under strand 6 and then over strand 1. Repeat this process until all the dough is braided, and then pinch and tuck the ends underneath.
For a round braid
You can also transform bread into elegantly plaited round loaves. For round braids, follow our guided step-by-step directions in this braided round challah recipe.
Braided Bread Tips
Watch for loose vs. tight braids
As you braid your loaf, do your best to apply the same amount tension on strands as you weave them together; they should have the same amount of spacing between them. We recommend a looser plait because it allows room for expansion and prevents a stretched or “pulled” look upon baking.
Editor’s Tip: The rules of baking regular bread apply to braided bread, too. Don’t make these common bread-baking mistakes.
Keep the strand size consistent
Even baking and a professional appearance begin with the even shaping of your dough strands. Use a kitchen scale to divide your dough into equal portions for the best results. Then, roll the ropes evenly into strands of equal length and thickness.
If your dough is resistant, do some initial shaping to get started, then allow the dough to rest for 15 to 20 minutes. This allows the gluten to relax and make the dough more pliable, so it stretches easily and does not shrink back.
Don’t overbake the bread
There are a few tricks to knowing when bread is done. The most foolproof method is using an instant-read thermometer to test the internal temperature of the loaf towards the end of baking. Most braided loaves enriched with eggs, milk or butter should be fully baked once they reach 190° to 195°F. For lean braided bread loaves, made simply with water, flour, yeast and salt, aim for an internal temperature of 205° to 210°.
The one downside to using an instant-read thermometer is that you will mar the surface with a puncture mark wherever you insert the thermometer. If this bothers you, you can judge your loaf based on its color. A properly baked loaf should have a rich, golden brown appearance. Fully baked loaves should feel firm to the touch in the center and sound hollow when tapped on the bottom.
Undercooked? It happens to the best of us. You can fix undercooked bread with a few easy steps.