This step-by-step guide shows you how to spatchcock a turkey quickly and easily for a juicy, perfectly cooked bird.
After culinary school, I had an evening job as a line cook and a day job in a test kitchen. I never knew if I would be prepping live lobsters, decorating sugar cookies or testing Thanksgiving dinner ideas. So I was unfazed when asked to create a recipe for spatchcocking a turkey, even though the method was new to me. I jumped right in, and within a few minutes, I had cut out the backbone, flipped the bird over and lightly flattened the turkey. Success!
The word “spatchcock” may sound fancy, but it has practical origins. It’s thought to have come from the 18th-century Irish expression “dispatch the cock,” which described splitting, flattening and grilling a bird over a hot fire. Today, spatchcocking refers to butterflying a whole chicken or turkey by removing the backbone and laying the bird flat to ensure even cooking.
It’s lauded as a quick-cooking option, and it really is fast. The bird turns out perfectly golden, crisp and tender in a fraction of the time it takes to roast a whole turkey. Ready to give it a try? Our step-by-step guide will show you how to spatchcock a turkey for your best bird yet.
Why spatchcock a turkey?
There are several reasons to spatchcock a turkey, but the most important one is the superior taste. Some Thanksgiving turkey recipes yield dry meat or inconsistent seasoning, but not a spatchcocked turkey. The butterflied shape makes it simple to season, whether you brine it overnight, rub it with a spice blend or slip your favorite flavored butter recipe under the skin. And because the bird is flattened to even height, the white and dark meat stay juicy and cook at the same rate.
Though the presentation isn’t traditional, there are a few more reasons we prefer a spatchcocked turkey:
It’s quick: Because the bird is flattened, the cooking time is cut almost in half.
The bird cooks evenly: A whole bird has a round shape, so the breast meat cooks faster than the dark meat and can dry out. By flattening the turkey, the legs and thighs (dark meat) are more directly and evenly exposed to the heat, so they cook in the same time as the breast.
The skin gets nice and crispy: Since the turkey is stretched out, there are no hidden areas of skin on the underside of the legs and thighs that can remain pale or flabby when cooked. A spatchcocked turkey has all its skin exposed to direct heat, so it will evenly brown and develop that crave-worthy crispiness.
It’s easier to fit in a crowded oven: A flattened turkey can be placed on a rimmed baking sheet (no expensive roasting pan needed!). It takes up less space in the oven than a whole turkey, allowing you to arrange the oven racks above or below it. Depending on the size of your oven, you may be able to cook other Thanksgiving side dishes while the bird cooks.
How to Spatchcock a Turkey
ⓘ
Spatchcocked Turkey Ingredients
1 turkey (12 to 14 pounds)
3 tablespoons kosher salt
2 teaspoons coarsely ground pepper
1 tablespoon minced fresh rosemary
1 tablespoon minced fresh thyme
1 tablespoon minced fresh sage
What you’ll need to spatchcock a turkey
Kitchen shears: These heavy-duty kitchen scissors are the easiest tool for removing the turkey’s backbone. Look for shears that come apart to make cleaning a breeze. If you don’t have any, you can use a hefty knife, like a cleaver or a large chef’s knife. Cutting through bones can dull the edge, so you may need to sharpen your knife afterward.
Large cutting board: This task requires a turkey-size cutting board, ideally one with a groove around the board’s perimeter to collect the juices. Make sure to wash it thoroughly between spatchcocking and carving.
Baking sheet with rack: A baking sheet and rack are better than a roasting pan for a spatchcocked turkey. The shallow depth allows air to circulate around the bird for even drying and roasting.
Directions
Step 1: Pat the bird dry
Using paper towels, dry your turkey inside and out to remove any extra moisture. This makes it less slippery and easier to handle. Plus, the less moisture, the crisper the skin will become as it cooks. (In addition to food safety concerns, this is another reason why you should not wash your turkey.)
Editor’s Tip: Lay a damp cloth underneath your cutting board to keep it from sliding while you work.
Step 2: Cut along one side of the backbone
Taste of Home
Place the whole turkey on a cutting board, breast-side down. Locate the backbone along the center of the bird, and use your fingers to find the edge of the bone. Starting at the tail, use a sharp pair of kitchen shears to cut alongside the spine. Try to cut as close as possible to the backbone to avoid cutting into the meat or other joints. If you encounter a thick rib bone, use both hands to press down on the shears and get through it.
Editor’s Tip: Finding it difficult to cut? Stand on a stool for extra leverage and make small cuts using the base of the shears (where the blades meet), not the tip.
Step 3: Remove the backbone
Taste of Home
Rotate the turkey 180 degrees so the uncut side is by your dominant hand. Cut along the spine again until the backbone is completely detached.
Editor’s Tip: Don’t throw away that backbone! Place it in a freezer-safe bag and stash it in the freezer for your next batch of homemade turkey stock or make-ahead turkey gravy.
Step 4: Flatten the bird
Taste of Home
Flip the turkey over so the breast side is facing up. With the palms of your hands (and a little bit of Hulk-strength), press down firmly on the center of the bird until you hear the light crack of the wishbone breaking. Give the wings a quick twist and tuck them underneath the body of the bird. This prevents the wingtips from burning and keeps your bird nice and flat.
Editor’s Tip: Don’t worry if there’s some extra skin by the neck or thighs. It protects the meat from drying out, and it will shrink as the turkey roasts.
Step 5: Season and chill
Taste of Home
Transfer the turkey to a rack set over a foil-lined rimmed baking sheet. Mix the salt, pepper and minced herbs, and rub generously over the turkey. Rubbing the turkey with herbs infuses flavor into the bird, and the salt draws out extra moisture, making the skin extra crispy when roasted.
Pop it in the fridge, uncovered, overnight. The next day, let the bird come to room temperature while the oven preheats.
Editor’s Tip: You might be tempted to cover the turkey with plastic wrap or foil before chilling, but it’s actually best to let it air out. The more the skin is exposed to air drying in the fridge, the crispier it will be after roasting.
Ways to Cook a Spatchcocked Turkey
Taste of Home
Roasted: Roasting a spatchcocked turkey is the easiest way to cook it. It’s similar to cooking a whole roast turkey, although it cooks much faster (about five to seven minutes per pound). Preheat the oven to 450°F and roast the bird on a wire rack set over a rimmed baking sheet. Cook until a thermometer inserted into the thickest part of the thigh reads between 170° and 175°, 1 hour and 15 minutes to 1 hour and 30 minutes. Ovens can heat unevenly, so rotate your turkey about halfway through and check the internal temperature on both sides of the bird.
Grilled: Grilling is a delicious way to free up your oven for sides and pies. A grilled spatchcocked turkey follows the same basic steps as a whole grilled turkey. Prepare the grill for medium indirect heat, between 325° and 375°. Grill skin-side down for the first hour, then flip and continue to grill until a thermometer inserted into the thickest part of the thigh reads between 170° and 175°, 30 to 60 minutes longer. Since grill temperatures can fluctuate, the exact cooking time will vary.
Smoked: A smoked turkey is the slowest cooking method, but it’s mostly hands-off once the smoker is set up. Prepare a grill or smoker for indirect cooking between 275° and 300°. The butterflied bird’s extra surface area absorbs more smoke flavor, so stick to mild wood chips like apple or cherry. Smoke the turkey breast-side up until a thermometer inserted in the thickest part of the thigh reads 170°-175°, rotating halfway through. A whole turkey takes 15 to 20 minutes per pound at this temperature, but a spatchcocked turkey should cook in about half the time.
Spatchcocked Turkey Tips
How long should a spatchcocked turkey rest before carving?
You should let a spatchcocked turkey rest for at least 15 minutes before transferring it to a cutting board and carving. Resting helps the meat retain its juices, and the slightly cooler surface is easier to handle. After you carve the turkey, don’t forget to save the bones for stock, gravy or soup.
How long does it take to butterfly a turkey?
Butterflying a turkey is a relatively quick process and shouldn’t take longer than 10 minutes, maybe 20 minutes tops. Once you’ve identified the backbone, cutting it out takes just a few minutes. Of course, tackling any new skill takes longer than the next attempt. Give yourself some extra time if you’re new so you don’t feel rushed.
What size turkey is best for spatchcocking?
A moderately-sized turkey between 12 and 15 pounds is the easiest to spatchcock. Larger birds have thicker bones that are harder to cut through with shears. If you need to spatchcock a large turkey, you can ask your butcher to do it for you, or use a cleaver as necessary to chop or crack through stubborn bones. If you’re nervous about spatchcocking a turkey, I suggest starting with a small turkey (5 to 10 pounds) or practicing by spatchcocking a chicken.
Can you spatchcock a turkey the day before cooking?
We actually recommend spatchcocking a turkey the day before cooking it, as seasoning it ahead of time is a great way to infuse flavor into the skin and meat. Try dry brining the turkey by rubbing it with salt and letting it sit in the fridge, uncovered, overnight. Store the raw turkey on the bottom shelf in the refrigerator so it won’t contaminate any other food if there is a leak.
Should you brine a turkey before spatchcocking?
It’s better and more efficient to brine a turkey after spatchcocking, whether you use a dry brine or a regular turkey brine flavored with herbs, citrus, garlic or chiles. If using a wet brine, you’ll need less liquid to cover a spatchcocked turkey because it collapses and folds on itself in a large stockpot or brining bag, taking up less space.
How do you serve a spatchcocked turkey?
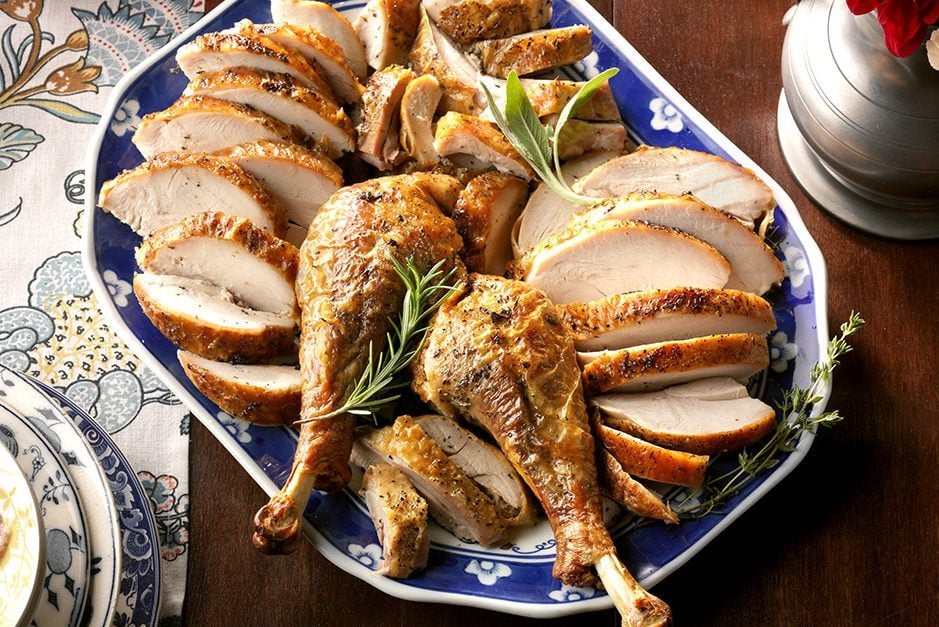
Spatchcocked turkey pairs well with all the best Thanksgiving sides, so serve it with your favorite cranberry sauce recipes, creamy mashed potatoes and Thanksgiving stuffing recipes. The one downside about spatchcocked turkey is that you probably can’t carve it tableside, as it’s likely too big for most serving platters. Instead, we recommend carving it in the kitchen and arranging the pieces on a platter to pass around.
How do you store leftovers from a spatchcocked turkey?
Store leftover spatchcocked turkey in an airtight container in the refrigerator for up to four days. You can slice or shred the meat, or you can leave it in large pieces on the bone. To freeze turkey, remove the meat from the bone and transfer it to a freezer-safe container. Store it in the freezer for up to three months.
Thaw frozen turkey in the refrigerator overnight. Reheat turkey in a 300° oven or the microwave, and be sure to add a splash of water or broth to keep the meat tender.
We are no longer supporting IE (Internet Explorer) as we strive to provide site experiences for browsers that support new web standards and security practices.