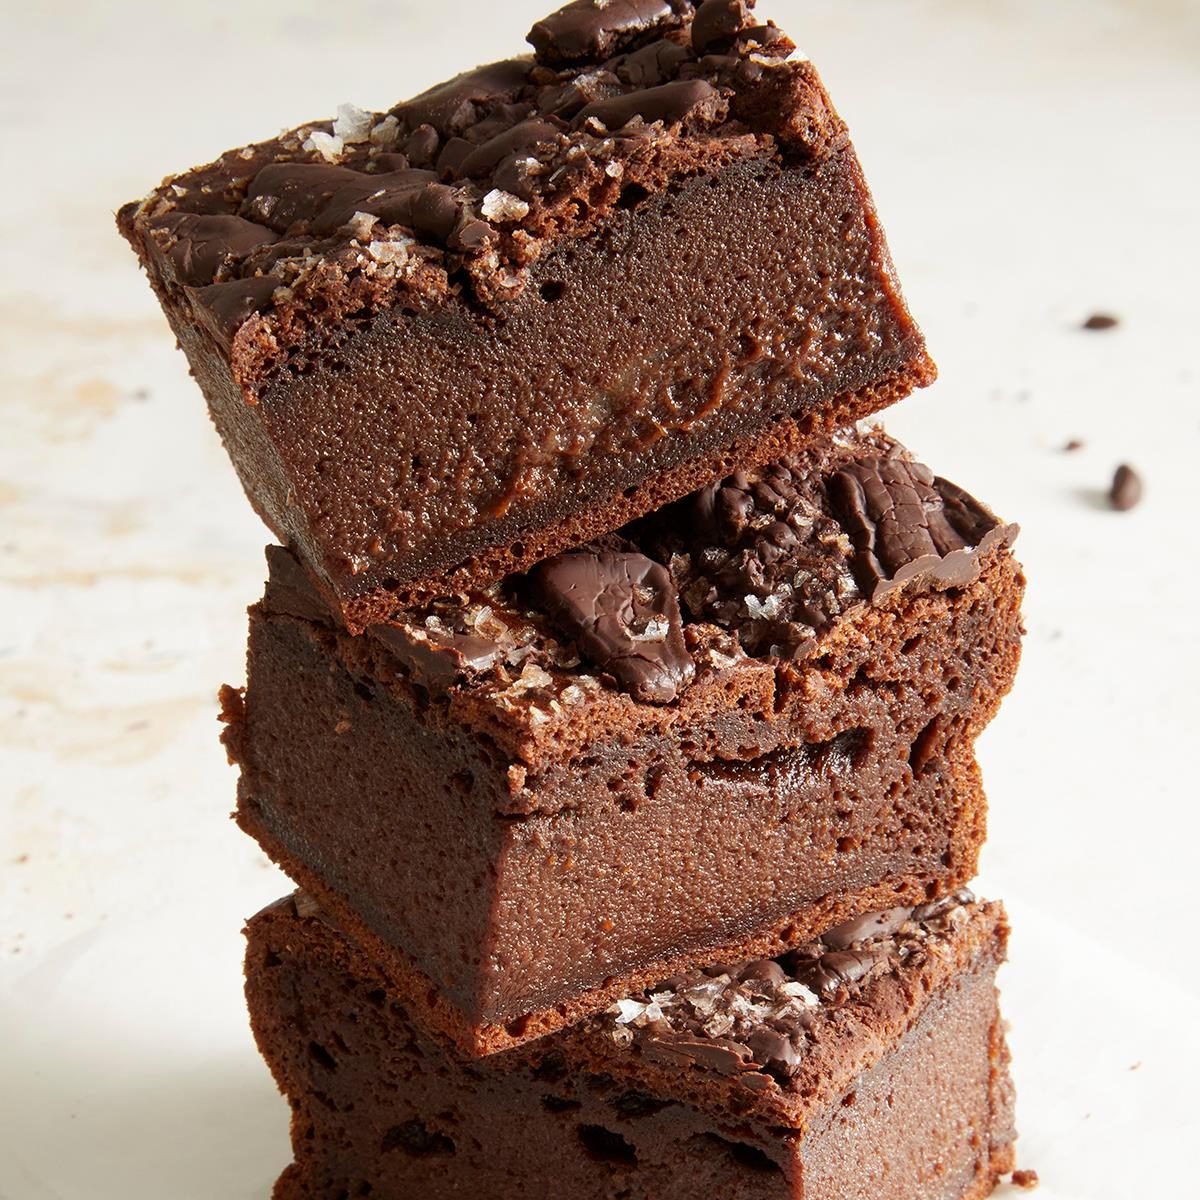

Mochi brownies are a textural treat. Made with two different kinds of chocolate, they’re intensely rich and decadent, too.
Mochi brownies have officially one-upped classic brownies. Chewy, dense, fudgy and super chocolaty, this dessert is the perfect cross between bouncy Japanese mochi and decadent chocolate brownies. So what’s the secret? All we do is swap all-purpose flour for mochiko—a sweet rice flour derived from sticky rice that’s used to make traditional mochi. Plus, it makes these brownies naturally gluten free!
Ingredients for Mochi Brownies
- Sweet rice flour: The most important ingredient in this mochi brownie recipe is the sweet rice flour. It’s what gives the brownies the same chewy, elastic texture as mochi. It’s not a super common ingredient for grocery stores to carry, so call ahead of time or buy it online.
- Sugar: Granulated sugar adds sweetness to the mochi brownies.
- Milk: Warm the 2% milk (but don’t let it boil) so it can activate the sweet rice flour.
- Baking cocoa: If possible, splurge on the best cocoa powder for a rich, high-quality chocolate flavor in your brownies.
- Baking powder: Baking powder will help the mochi brownies puff and rise.
- Butter: Butter enriches the brownies. We’re going to melt it, so there’s no need to bring it to room temperature beforehand.
- Eggs: Eggs will work with the sweet rice flour to give the brownies structure. Take them out of the fridge 30 minutes before starting the recipe so they can come to room temperature.
- Vanilla extract: A bit of vanilla extract adds a subtle floral sweetness to the brownies.
- Dark chocolate: The dark chocolate gets chopped up and spread on top of the brownies before baking, so there’s a lot of chocolate flavor in every mochi brownie.
Directions
Step 1: Prepare the pan
Preheat the oven to 350°F. Grease an 8×8-inch square baking pan and line it with parchment paper. Set the pan aside.
Step 2: Hydrate the sweet rice flour

In a large microwaveable bowl, whisk together the sweet rice flour and sugar. Whisk in the warm milk, then cover the bowl with storage wrap. Microwave it on high for three minutes. If runny, microwave it in 20- to 30-second increments more until the mixture resembles playdough. Set the mochi aside.
Step 3: Make the brownie batter

In another large mixing bowl, whisk together the baking cocoa, baking powder, melted butter, eggs and vanilla extract until the mixture resembles a mousse, two to three minutes.

Add it to the bowl with the rice dough and mix until they’re evenly incorporated.
Step 4: Bake

Transfer the brownie mixture to the prepared baking pan, pressing it down into an even layer. Sprinkle it with the chopped chocolate pieces and, if desired, flaky salt. Bake it until the edges are crisp and the center is soft, 45 to 55 minutes. Remove the pan from the oven and place it on a wire rack to cool completely to room temperature before slicing the mochi brownies.

Recipe Variations
- Add extra toppings/mix-ins: We added chopped pieces of chocolate and a sprinkle of flaky salt to these mochi brownies, but you can add even more! Top the batter with nuts for texture, dried fruit for a kick of tangy sweetness or chopped candies or cookies like Reese’s or Oreos for added decadence. Then bake the brownies as directed.
- Top with chocolate frosting: I always like to frost my homemade brownies with chocolate frosting to make them that much more decadent. Alternatively, you could just dust them with powdered sugar for a subtle sweetness boost.
How to Store Mochi Brownies
Once the mochi brownies have cooled to room temperature, cover them in the pan with storage wrap, or transfer them to an airtight container. You can store them at room temperature for up to four days.
Can you freeze mochi brownies?
Yes, you can freeze mochi brownies. Allow them to cool completely, then cover the pan very tightly in one layer of storage wrap followed by one layer of aluminum foil. You really want to protect them from freezer burn, so make sure the brownies are covered! Freeze the mochi brownies for up to three months, and thaw them overnight in the fridge before eating them.
Mochi Brownies Tips

Are mochi brownies gluten free?
Yes, mochi brownies are gluten free. Sweet rice flour is gluten free, and there are no other gluten-containing ingredients in the brownies. However, if you’re feeding anyone who is particularly sensitive, double-check the other packaged goods to ensure they’re certified gluten free, or that they were not processed in a facility that handles wheat.
Can you use regular rice flour or other types of flour for the same effect?
Unfortunately, you cannot use regular rice flour or other types of flour to achieve the same stretchy, chewy, mochi-like effect. Sweet rice flour is made from sticky rice, which gives mochi that bouncy, elastic texture.
Why are my mochi brownies so hard to cut?
Mochi brownies are easier to cut once they’ve cooled completely to room temperature. When they’re still warm, they’ll be super sticky and very messy to cut. It’s hard to wait once they’re baked, but it’s worth it!
Ingredients
- 2 cups sweet white rice flour
- 1 cup sugar
- 2 cups 2% milk, warmed
- 1 cup baking cocoa
- 2 teaspoons baking powder
- 1/2 cup butter, melted
- 4 large eggs, room temperature
- 1-1/2 tablespoons vanilla extract
- 1 (3-1/2 ounces) dark chocolate candy bar, chopped
- 2 teaspoons flaky salt, optional
Directions
- Preheat the oven to 350. Grease an 8x8-in. square baking pan; line with parchment. Set aside.
- In a large microwaveable bowl, whisk together sweet rice flour and sugar. Whisk in warm milk. Cover the bowl with plastic wrap. Microwave on high for 3 minutes. If runny, microwave in 20- to 30-second increments until mixture resembles playdough. Set aside.
- In another large mixing bowl, whisk together baking cocoa, baking powder, melted butter, eggs and vanilla extract until it resembles mousse, 2-3 minutes. Add mixture to bowl with rice dough; mix until evenly incorporated.
- Transfer brownie mixture to the prepared baking pan, pressing it down into an even layer. Sprinkle with chopped chocolate pieces and, if desired, flaky salt. Bake 45-55 minutes or until edges are crisp and the center is soft. Remove to a wire rack to cool completely.
Loading Popular in the Community
Sweet rice flour makes these mochi brownies a bit chewier than a regular brownie, yet still as fudgy and chocolaty as their counterparts! —Lucy Wang, Los Angeles, California
Recipe Creator
Loading Reviews